Ecology and Environmental Science Projects
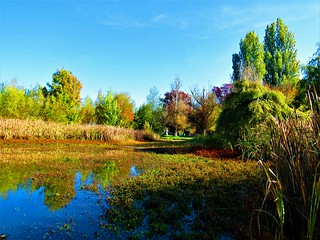
Chemical Contamination of Lakes and Streams
One way to test for contamination in water from lakes, rivers and streams is with a bioassay.
https://www.flickr.com/photos/29638108@N06/44832998204/
A bioassay uses a living organism--usually a plant or a bacteria--as a test agent for the presence or concentration of a chemical compound or a disease. The idea is to choose a test agent that is very sensitive to the condition you are testing.
Have you ever read about how miners took canaries down into mines to act as early warnings of gas leaks? Because canaries are more sensitive to gas than people, the birds reacted to very small amounts of gas and gave miners a chance to escape. You could say canaries were a bioassay for underground gas.
Different plants are often used as bioassays because they respond in a predictable way and are often very sensitive to the condition that is being tested. A standard toxic dose--the level at which no seeds of the bioassay plant sprout or all the plants die--is established as a reference point. Then samples are tested and compared to the reference standard.
Of all the possible water-quality bioassay organisms, lettuce might be one of the last you would think of. Lettuce doesn't live in water, so why use it to test water quality? The reason is lettuce bioassays are inexpensive, easy to do, and the seeds are pretty sensitive to some types of contaminants in water, including heavy metals, pesticides and other organic toxins. Although any variety of lettuce may do, Lactuca sativa Buttercrunch is the standard variety recommended for bioassays by the U.S. Environmental Protection Agency, the Food and Drug Administration, and the Organization for Economic Cooperation and Development.
You might try taking a series of samples along one stream or compare streams near industry to water running though agricultural areas.
Directions for conducting experiments can be found at: Lettuce Bioassay. (http://ei.cornell.edu/toxicology/bioassays/lettuce/)
Acid Rain
For most of the following experiments, you will need a pH indicator, such as wide-range litmus or pH paper, a garden soil pH testing kit, or a pH indicator that you can make yourself in Experiment 3. These pH indicators contain a chemical that changes color when it comes in contact with acids or bases.
For example, litmus and pH paper turn red in strong acids and blue in strong bases. Because only a few pH indicators measure pH over a wide range of pH values, you will need to find out the pH range of the indicator you use. Typically, the color chart provided with each pH indicator kit will show the pH range of that indicator.
Color pH indicators provide only an approximate measure of the pH, or the strength of the acid or base. They are not as accurate as the expensive instruments scientists use to measure pH, but they are adequate for the following experiments.
Measuring With pH Paper
When measuring pH with pH paper, dip the end of a strip of pH paper into each mixture you want to test. After about two seconds, remove the paper, and immediately compare the color at the wet end of the paper with the color chart provided with that pH indicator. Write down the pH value and color. Always use a clean, unused strip of pH paper for each mixture that you test
Measuring Liquids with a Garden Soil pH Test Kit
Soil pH test its are designed to measure the pH of soil, but they may also be used to measure the pH of liquids, such as water and water mixtures. Most of these kits contain a test solution (liquid pH indicator), color chart, and clear plastic test container, such as a test tube.
To measure pH, pour 1/4 teaspoon of the mixture you want to test into the test container, and add 1/4 teaspoon of the test solution provided in the kit. Cover the container and shake once or twice to mix, or stir if necessary. Compare with the color chart provided with the kit and write down the result.
Tips
- Except for pH test paper, all the materials called for in these experiments, including distilled water and borax, can be obtained at grocery stores or from local lawn and garden stores or nurseries.
- pH test paper can be ordered online at Amazon.com. Or, inexpensive garden soil pH testing kits are often available at lawn and garden stores or nurseries. These testing kits usually contain a pH indicator solution that covers a range of at least pH 4 to 10, which is wide enough for most of the following experiments.
- You may substitute baking soda for household ammonia in the experiments. If you do, be sure to stir well because baking soda does not dissolve easily in water unless heated. The pH of undissolved baking soda will not be the same as dissolved baking soda.
- You may substitute fresh-squeezed lemon juice for white vinegar. Lemon juice is slightly more acidic than the vinegar sold in grocery stores. White vinegar is preferred over cider vinegar or lemon juice because it is colorless and relatively free of impurities.
- Use clean, dry containers and utensils.
Experiment 1: Measuring pH
This experiment will illustrate how to measure the approximate pH of chemicals in water using a pH indicator. A pH indicator is a chemical that changes color when it comes in contact with acids or bases.
Materials:
- pH paper and color chart (pH range 3 to 12) or garden soil pH testing kit distilled water (available at grocery stores and drug stores)
- white vinegar
- household ammonia (or baking soda)
- 3 small, clear cups or glasses
- 3 stirring spoons
- measuring cups and spoons (1/2 cup, 1/3 and 1 teaspoon)
- notebook and pencil
Procedure:
- Rinse each cup with distilled water, shake out excess water, and label one cup vinegar, the second cup ammonia, and the third cup water.
- Pour 1/2 cup distilled water into each of the 3 cups.
- Add 1/2 teaspoon white vinegar to the vinegar cup and stir with a clean spoon.
- Add 1/2 teaspoon ammonia to the ammonia cup and stir with a clean spoon.
- Do not add anything to the water cup
- Dip an unused, clean strip of pH paper in the vinegar cup for about 2 seconds and immediately compare with the color chart. Write down the approximate pH value and set the cup aside. (If using a garden soil pH tester kit, pour 1/4 teaspoon of the contents of the vinegar cup into the test container, and add 1/4 teaspoon of the test solution. Cover the test tube and shake once or twice to mix, or stir if necessary. Compare with the color chart provided in the kit, and record the result.
- Dip an unused, clean strip of pH paper in the ammonia cup for about 2 seconds and immediately compare with the color chart. Write down the approximate pH value and set the cup aside. (If using a garden soil pH tester kit, repeat the same process in step 6 using the contents of the ammonia cup instead of the vinegar cup.)
- Dip an unused, clean strip of pH paper into the water cup for about 2 seconds and immediately compare with the color chart. Write down the approximate pH value. (If using a garden soil pH tester kit, repeat the same process above using the contents of the water cup instead of the ammonia cup.)
Questions and Answers
Is vinegar an acid or a base?
Vinegar is an acid, and in this experiment it will display a pH of about 4. Vinegar at pH 4 turns pH paper yellow and most other pH indicators red.
Is ammonia an acid or a base?
Ammonia is a base and in this experiment it will display a pH of about 12. Bases turn most pH indicators blue.
Did distilled water have a neutral pH?
PURE distilled water would have tested neutral, but pure distilled water is not easily obtained because carbon dioxide in the air around us mixes, or dissolves, in the water, making it somewhat acidic. The pH of distilled water is between 5.6 and 7. To neutralize distilled water, add about 1/8 teaspoon baking soda, or a drop of ammonia, stir well, and check the pH of the water with a pH indicator. If the water is still acidic, repeat the process until pH 7 is reached. Should you accidentally add too much baking soda or ammonia, either start over or add a drop or two of vinegar, stir, and recheck the pH.
Experiment 2: Determining the pH of Common Substances
In this experiment you will use a pH indicator to measure the pH of some fruits, common beverages, and borax.
Borax is a cleaning agent that some people add to their laundry detergent. It is available at grocery stores.
Many foods and household cleaners are either acids or bases. Acids usually taste sour, and bases bitter. Household cleaners are poisons so you should never taste them.
Materials:
- pH paper and color chart (range pH 2 to 12) or garden soil pH testing kit
- 3 fresh whole fruits (lemon, lime, orange, or melon)
- 3 beverages (cola, carbonated non-cola, milk)
- 1/8 teaspoon borax
- measuring spoons (1/4 and 1/8 teaspoons)
- 4 small, clear cups or glasses
- 1 clean stirring spoon
- notebook and pencil
- paring knife
Procedure:
- Cut each fruit in half, drying off the knife after each cut.
- Place an unused strip of pH paper half-on and half-off the inside of the cut fruit. Leave until wet (about 2 seconds). Immediately compare with the color chart. Write down the approximate pH value of the fruit. (If using a garden soil pH tester kit, squeeze 1/4 teaspoon of juice from the cut fruit into the test container, and add 1/4 teaspoon of the test solution. Cover the test container and shake once or twice to mix, or stir if necessary. Compare with the color chart provided in the kit, and record the result.)
- Repeat the same process for the other 2 fruits.
- Label the 3 cups: one cola, another non-cola, and the third milk.
- Pour each liquid into an appropriately labeled cup.
- Dip an unused strip of pH paper into the cola, compare with the color chart, and record the result. Repeat the same process for the remaining beverages. Be sure to use a clean, unused strip of pH paper for each one. (If using a garden soil pH tester kit, pour 1/4 teaspoon of cola into the test container, and add 1/4 teaspoon of the test solution. Tightly press your finger over the top of the test container and shake once or twice to mix, or stir if necessary. Compare with the color chart provided in the kit, and record the result.)
- Add 1/8 teaspoon borax to 1/4 cup distilled water and stir for about 2 minutes.
- Dip an unused strip of pH paper in the borax mixture, compare with the color chart, and record the result. (If using a garden soil pH tester kit, pour 1/4 teaspoon of the borax/water mixture into the test container, and add 1/4 teaspoon of the test solution. Tightly press your finger over the top of the test container and gently shake, or stir if necessary. Compare with the color chart provided in the kit and record the result.)
Questions and Answers
Are lemons, limes and oranges acids or bases?
These fruits all contain acids and taste sour. Lemons and limes have pH values near 2. Oranges may be slightly less acidic than lemons and limes, but your pH indicator may not be accurate enough to show the difference.
Are colas and non-colas acids or bases?
They are both acidic, primarily becasue they both contain carbon dioxide to make them fizz, and carbon dioxide and water produce carbonic acid. The pH of these beverages varies with the amount of carbon dioxide and other ingredients in them, but it is usually below
Was the milk acidic or basic?
Milk can be slightly basic or slightly acidic depending on its age and how it was processed at the dairy.
Was the borax/water mixture acidic or basic?
Borax contains a strong base and will turn most pH indicators blue. The approximate pH of the borax/water mixture is 9. Its alkaline properties make it an excellent cleaning agent, which is why some people use it to wash clothes.
Experiment 3: Making a Natural pH Indicator
In this experiment you will make your own pH indicator from red cabbage. Red cabbage contains a chemical that turns from its natural deep purple color to red in acids and blue in bases. Litmus paper, another natural pH indicator, also turns red in acids and blue in bases. The red cabbage pH indicator can be obtained by boiling the cabbage.
Materials:
- sliced red cabbage
- stainless steel or enamel pan or microwave casserole dish
- 1 quart water
- stove, microwave, or hotplate
- white vinegar
- ammonia or baking soda
- clear, non-cola beverage
- 3 glass cups (preferably clear)
- measuring spoons
- 3 clean teaspoons for stirring
- measuring cup (1/4 cup)
- notebook and pencil
Procedure:
- Boil cabbage in a covered pan for 30 minutes or microwave for 10 minutes. (Don't let water boil away.)/li>
- Let cool before removing the cabbage./li>
- Pour about 1/4 cup of cabbage juice into each cup./li>
- Add 1/2 teaspoon ammonia or baking soda to one cup and stir with a clean spoon./li>
- Add 1/2 teaspoon vinegar to second cup, stir with a clean spoon./li>
- Add about 1 teaspoon clear non-cola to the last cup and stir with a clean spoon./li>
- After answering the first two questions for this experiment, pour the contents of the vinegar cup into the ammonia cup.
Related Experiment: Neutralizing Acids or Bases Using a Garden Soil pH Tester Kit
Pour 1/4 teaspoon of the contents of the vinegar cup into the test container, and add 1/4 teaspoon of the test solution. Seal the top of the test container with your finger, shake once or twice, or stir if necessary, and compare with the color chart. Then pour about 1/4 teaspoon of the contents of the ammonia cup into the test container. Mix it and compare with the color chart. What happens to the pH ? What would happen if you added more of the ammonia mixture? (For answers: see questions 3 and 4.)
Questions and Answers
What color change took place when you added vinegar to the cabbage juice? Why?
The vinegar and cabbage juice mixture should change from deep purple to red, indicating that vinegar is an acid.
Did the ammonia turn the cabbage juice pH indicator red or blue? Why?
The ammonia and cabbage juice mixture should change from deep purple to blue, because ammonia, like baking soda, is a base, which reacts chemically with the pH indicator, turning it blue.
What happens to the color if you pour the contents of the vinegar cup into the ammonia cup?
You should find that the acid and base are neutralized, changing the color from blue or red to purple, which is the original, neutral color of the cabbage juice
If you were to gradually add vinegar to the cup containing the baking soda (or ammonia) and cabbage juice, what do you think would happen to the color of the indicator? Try it, stirring constantly.
As you add more vinegar, the acid level increases and the color becomes red.
Is the non-cola soft drink acidic or basic?
It is acidic and turns the cabbage juice pH indicator red.
Experiment 4: Measuring Soil pH
In this experiment you will collect soil and measure its pH. Soil pH is one of several important conditions that affect the health of plants and animals. In addition, you will also be asked to survey the plants and animals that live in the area where you collected the soil. Area surveys provide information about how well plants and animals can live under different conditions.
For this experiment, you will need an inexpensive garden soil pH test kit, which may be obtained from lawn and garden stores or nurseries.
Materials:
- garden soil pH test kit
- distilled water
- 2 cups soil from each of two or three different locations (some of the soil will be needed for the "Soil Buffering" experiment)
- measuring spoons
- digging tool
- self-sealing plastic bags
- notebook and pencil/li>
Procedure:
- Pick two or three different soil locations, such as a garden, wooded area, city park, or meadow. Ask an adult to go with you.
- At each location, observe the plants and animals living in or rooted on these soils, especially those that are in greatest numbers. Write down as much as you can about what you find. Dig down about 2 inches, scoop out 2 cups of soil, and seal it in a plastic bag for later use. Label each plastic bag. Be sure to clean your digging tool after collecting soil samples at each location.
- Measure the pH of each soil sample following the directions provided in the garden soil pH test kit, and record the approximate pH of each soil sample.
- Save the excess soil from each site for use in the "Soil Buffering" experiment.
Questions and Answers
Were there any big differences between the plant and animal life at each location?
Some types of plants and animals are able to live in acid soils, while others are not. Be aware, however, that many factors, not just the soil acidity, determine the types of plants and animals that occur at a particular site.
Were any of your soil samples acidic?
Some plants require acid soils to grow and thrive. For example, pine trees, azaleas, rhododendrons, cranberries, blueberries, potatoes, and tomatoes prefer acid soils. However, most plants thrive only in soils of pH 6 to 7.
Were any of your soil samples basic?
Some soils, such as in many midwestern United States, contain a lot of limestone and are alkaline. In those locations, people often add sulfate, such as ammonium bisulfate to soil to make it less basic.
Experiment 5: Soil Buffering
Soil sometimes contains substances, like limestone, that buffer acids or bases. Some salts in soil may also act as buffers. In this experiment you will find out if soil from your lawn, garden, or school can buffer acids. You will observe the pH change of an acid mixture poured over soil in a filter. If the water collected from the filter is less acidic than the original mixture, then the soil is buffering some of the acid. If it does not change, then the soil may not be capable of buffering acids. Since the buffering capability of soils differs, you may want to do this experiment with several different soil types including those collected for the "Soil pH" experiment.
Materials:
- pH paper and color chart (pH range 2 to 10) or garden soil pH test kit
- about 2 cups of soil from a garden, wooded area, lawn, or school yard
- distilled water
- white vinegar
- measuring cups and spoons
- stirring spoon
- large funnel
- 3 coffee filters
- paper cup
- notebook and pencil
Procedure:
- Pour 1 teaspoon of vinegar into 2 cups of distilled water, stir well, and check the pH with either pH paper or a garden soil pH testing kit. The pH of the vinegar/water mixture should be about 4. If it is below that, add a sprinkle of baking soda, stir well, and recheck the pH; but if it is above pH 4, add a drop or two of vinegar and again recheck the pH.
- Put 1 coffee filter into the funnel, and fill the filter with soil from one location. Do not pack the soil down.
- Hold the filter over a paper cup and slowly pour the vinegar/water mixture over the soil until some water collects in the paper cup (the filter may clog quickly, but you need only a small amount of water).
- Check the pH of the collected water using either pH paper or a garden soil pH testing kit and record the results.
- Repeat the experiment with other soil samples, using a new coffee filter for each sample.
Questions and Answers
Did the pH of the collected water stay the same as the original mixture, increase, or decrease?
If the pH stayed the same, the soil did not buffer the acid. Each pH value above 4 indicates that the soil buffered increasing amounts of the acid. Even soil capable of buffering acids can be overpowered if enough acid is added. As more acid is added to the soil, the buffering capability decreases, and the water from the filter becomes more acidic.
What can you add to the soil to increase its buffering capability?
Limestone can be added, but it takes weeks to months for the limestone to work into the soil.
Experiment 6: Observing the Influence of Acid Rain on Plant Growth
Acid rain most often damages plants by washing away nutrients and by poisoning the plants with toxic metals. It can, however, have direct effects on plants as well. In this experiment you will observe one of the direct effects of acid water on plant growth. The experiment will take about 2 weeks.
Materials:
- 4 cups or jars
- distilled water
- white vinegar
- measuring cups
- stirring spoon
- 2 cuttings of a philodendron plant (1 leaf and small amount of stem)
- 2 cuttings of a begonia or coleus plant (1 leaf and small amount of stem)
- notebook and pencil
Procedure:
- RPour 1 teaspoon of vinegar into 2 cups of distilled water, stir well, and check the pH with either pH paper or a garden soil pH testing kit. The pH of the vinegar/water mixture should be about 4. If it is below pH 4, add a sprinkle of baking soda, or a drop of ammonia, stir well, and recheck the pH. If it is above pH 4, add a drop or two of vinegar and again recheck the pH.
- Measure the pH of the distilled water using either pH paper or a garden soil pH testing kit. If the pH is below 7, add about 1/8 teaspoon baking soda, or a drop of ammonia, stir well, and check the pH of the water with the pH indicator. If the water is still acidic, repeat the process until pH 7 is reached. Should you accidentally add too much baking soda or ammonia, either start over again or add a drop or two of vinegar, stir, and recheck the pH.
- Put one of the following labels on each cup or jar:
- water philodendron
- acid philodendron
- water begonia (or coleus)
- acid begonia (or coleus) - Pour about a cup of distilled water into the water-philodendron and water-begonia cups.
- Pour about a cup of the vinegar/water mixture into the acid-philodendron and acid-begonia cups.
- Put one philodendron cutting into each philodendron labeled cup, covering the stem and part of the leaf with the liquid.
- Put one begonia cutting into each begonia-labeled cup, covering the stem and part of the leaf with the liquid.
- Set the cups where they are not likely to be spilled and where they will receive some daylight.
- About every 2 days, check to be sure that the plant cuttings are still in the water or vinegar/water. You may need to add more liquid if the cups become dry.
- After 1 week, compare the new root growth of each plant in distilled water with the new root growth of its corresponding plant in acid water. Record the results.
- After 2 weeks, again observe the plant cuttings for new root growth, and record the results.
Questions and Answers
Which plant cuttings had the fastest root growth, those in distilled water or those in acid water?
The plants grown in distilled water should grow faster than plants grown in acid water. Acid water, like acid rain, can directly damage plants and slow or stop new growth.
Experiment 7: Observing Buffers in Lakes, Ponds, and Streams
In this experiment you will observe the effects of limestone on the acidity of water. Some areas of the nation have a lot of limestone in lake bottoms and in soil, which helps neutralize the effects of acid rain. Crushed limestone is sometimes added to lakes, ponds, and other aquatic areas to help neutralize the effects of acid rain, thus preserving important aquatic systems until the source of acid rain can be reduced. Crushed limestone is easily obtained from local lawn and garden stores or nurseries.
Materials:
- pH paper and color chart (pH range 2 to 7) or garden soil pH testing kit
- white vinegar
- distilled water
- measuring cup and spoon
- 2 stirring spoons
- 1/2 cup crushed hydrated limestone or spray limestone
- 2 cereal bowls (about 2 cup size)
- plastic wrap
- notebook and pencil
Procedure:
- abel one bowl vinegar; the other one vinegar plus limestone.
- Pour 1/4 cup crushed limestone into one bowl.
- Pour 1 teaspoon of vinegar into 2 cups of distilled water, stir well, and check the pH with either pH paper or a garden soil pH testing kit. The pH of the vinegar/water mixture should be about 4. If it is below pH 4, add a sprinkle of baking soda, stir well, and recheck the pH; but if it is above pH 4, add a drop or two of vinegar and again recheck the pH.
- Pour about 1 cup of the vinegar/water mixture over the limestone in the cereal bowl and stir with a clean, dry spoon.
- Pour the remaining vinegar/water mixture into the other cereal bowl.
- Check the pH of the vinegar/water mixture over the limestone and record it.
- Cover each bowl with plastic wrap to prevent evaporation.
- Every day for 6 days, stir the contents of each bowl with a clean, dry spoon and about 4 or more hours later (after the limestone has settled), test the pH of the water mixture in each bowl and record the result.
Questions and Answers
Did the pH of the vinegar/water mixture over the limestone become more or less acidic during the 6-day period? Why?
The water mixture should have become less acidic, changing from about pH 4 to as much as pH 6, depending on the water content of the limestone you used.
Does crushed limestone buffer the acid?
Yes, by neutralizing it.
Did the pH of the vinegar/water mixture in the other bowl (without limestone) change during the 6-day period?
The pH of the bowl without limestone should not have changed.
Experiment 8: Looking at Acid's Effects on Metals
When acids and metals come in contact with each other, the metal is gradually dissolved away in a chemical reaction. In this experiment you will observe this reaction for yourself, but you will need patience. The chemical effect of acids on metals may take at least five days for the human eye to see, even though the reaction starts as soon as the acid contacts the metal.
Materials:
- pH paper and color chart (pH range 2 to 7) or garden soil pH testing kit
- 2 small, clear glasses (nonmetal)
- 2 clean copper pennies (use pennies minted before 1983)
- white vinegar or fresh-squeezed lemon juice
- distilled water
- plastic wrap
- notebook and pencil
Procedure:
- Label one glass water and the other vinegar or lemon juice depending on which acid you use.
- Place one penny in each glass. Be sure to use pennies minted before 1983 because pennies minted after that time have a different chemical composition.
- Barely cover one of the pennies with either vinegar or lemon juice.
- Dip a strip of pH paper into the vinegar, or lemon juice, for about 2 seconds, compare with the color chart, and record the result. Or use a garden soil pH test kit.
- Add enough distilled water to the glass labeled water to barely cover the other penny.
- Dip a strip of pH paper into the distilled water for about 2 seconds and compare with the color chart. Or use a garden soil pH test kit. If the pH is below 6, add a tiny amount (less than 1/8 teaspoon) of baking soda, or a drop of ammonia, and recheck the pH. Repeat this process until the pH is between 6 and
- Record the pH of the water. - Seal the top of each glass with plastic wrap to prevent evaporation.
- Place in a safe, dry place for about 5 days.
- After about 5 days, observe the changes that occurred in each glass.
- At the end of the experiment, wash off the pennies with water, and pour the contents of the glasses down the sink (do not drink).
Questions and Answers
What change, if any, took place in the water glass after 5 days?
There should be no change
What change, if any, took place in the vinegar (or lemon juice) glass after 5 days?
The liquid should be bluish-green. The bluish-green substance in the vinegar, or lemon juice, comes from the copper in the penny. It is a byproduct of the chemical reaction in which the acid in the vinegar, or lemon juice, very gradually eats away the penny.
When you rinsed off the pennies, were you surprised that they both looked about the same as they did at the beginning of the experiment (assuming you used clean pennies)?
The chemical reaction between the acid and the copper penny is so slow that you cannot see any difference in the shape of the metal in just 5 days, at least not with your eye alone. You may see some changes after about two weeks, especially at the edge of the penny.

